Captcha is a sort of verification used to cut down on bot traffic or other undesirable visitors to websites. Authentication by challenge-response is another name for it.
It is quite simple for you to add captcha to the website if you created it using WordPress. WordPress offers themes and plugins to maintain the website’s authenticity and lower the likelihood of encountering any harmful activity. We’ll go through the step-by-step process for adding captcha to WordPress forms in this article. I’m going to add captcha to my WordPress contact form right now.
Captcha may be added by a plugin or through WP Forms. Let’s go through each step in more detail.
Table of Contents
#1. Add CAPTCHA with WPForms
WPForms allows user to create register or login form for your WordPress website. We’ve discussed the in-detail procedure to add or create form in your WordPress website. After creating a form you can add captcha to it. Let us go through the procedure.
- Login to WordPress dashboard of your website.
- From the left panel list, click over WPForms and then Settings.

Since we previously selected v2, we will select v3 in this instance; nonetheless, v2 is still our preference.
After that, you will see the site key and secret key fields. To obtain these keys, you must first register your website on the Google reCAPTCHA page.
Creating reCAPTCHA
Go to the Google reCAPTCHA website and then click on the Admin Console button at the top right corner.
Go to v3 Admin Console and then follow the steps as directed.

Choose v3 from the list of reCAPTCHA types after entering your website’s name.
Then, type your domain name (without the https://www.) as seen in the image below.

You can enter the email address in the Owners section if you wish to make a different Gmail account the owner of the reCAPTCHA.
You must then agree to the reCAPTCHA terms of service. You may also choose to get email notifications from Google when your website receives questionable traffic by checking the box next to the “Send alerts to owners” option.
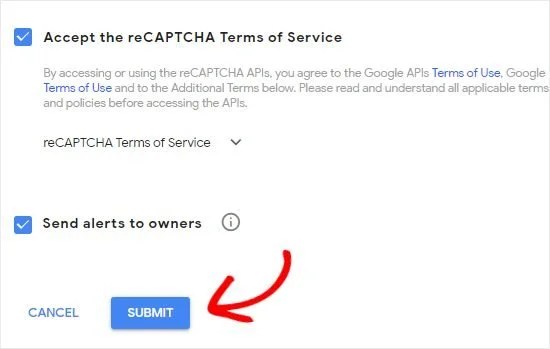
Once done, click on the Submit button.
After that, Google will show a success message along with the site key and the secret key to add reCAPTCHA to your site.

When you’ve obtained the Google reCAPTCHA API credentials, navigate to the WPForms » Settings page in your WordPress admin.
Just navigate to the reCAPTCHA tab.

Enter the site key and secret key on the WPForms reCAPTCHA settings page. After that, save your settings.
You may quickly enable reCAPTCHA in your custom login form, user registration form, or any form designed with WPForms now that you have successfully introduced reCAPTCHA to WPForms.
Now, let’s get started on creating a custom WordPress signup form.
Visit WPForms » Addons page. Locate ‘User Registration Addon’ and click on the ‘Install Addon’.

WPForms will then download and install the module. When the User Registration Addon’s state changes to ‘Active,’ you’re ready to create a new user registration form.
To use the WPForms Builder, navigate to WPForms » Add New. Choose the ‘User Registration Form’ template on the WPForms configuration page.

This will open the drag-and-drop form builder for WPForms.
Following that, WPForms will launch the Form Setup page and instantly create a unique user registration form.

Next, you need to click on the Settings option to configure your form settings and enable the Google reCAPTCHA.

At the bottom, you can see checkboxes including Enable Google v3 reCAPTCHA box.
Simply check the box to enable Google reCAPTCHA in your user registration form.
Once done, click on the Save button at the top right corner.

By selecting the Close button located next to the Save button, you can then close the form builder.
All done! You customized the WordPress user sign-up form and included reCAPTCHA in it.
The custom user registration form must then be added to your website. Your articles, pages, or any other location that is widget-ready may easily have the form added to it. We’ll make a new page, say, and add the form to it as an example.
Navigate to Pages » To create a new page, go to your WordPress dashboard and click Add New Page. Click the ‘+’ icon on your page edit screen and choose the WPForms block.

Next, you can see the WPForms widget added to your page edit screen. You just need to select the Custom User Registration Form you created earlier.
You won’t see a Google reCAPTCHA checkbox like ‘I’m not a robot’ in this example since we used reCAPTCHA v3. This is because reCAPTCHA v3 operates in the background, but a little badge will still appear in the bottom right corner.

Creating a custom login form follows a similar procedure.
The only difference is that you must select the User Login Form template from the WPForms configuration page.

After that, the whole process is the same.

We hope this article helped you to learn how to add CAPTCHA in WordPress login and registration forms.
#2. Add CAPTCHA using Plugins
Another way to add CAPTCHA to your WordPress website is with plugin. Let us go through the procedure to add captcha to WordPress using Plugin.
1. Login to your WordPress dashboard and get into Plugins section.
2. Click over Add New form the list.
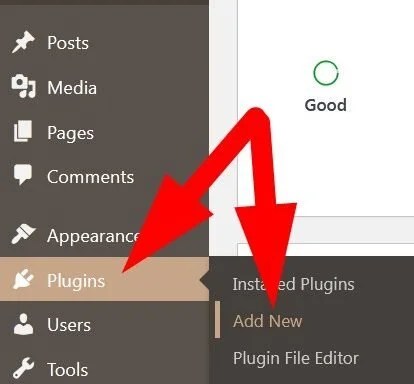
Add New Plugin
3. Search recaptcha in the search bar. Multiple Plugins related to it will appear.
4. Go to reCaptcha by BestWebSoft and click over Install Now.
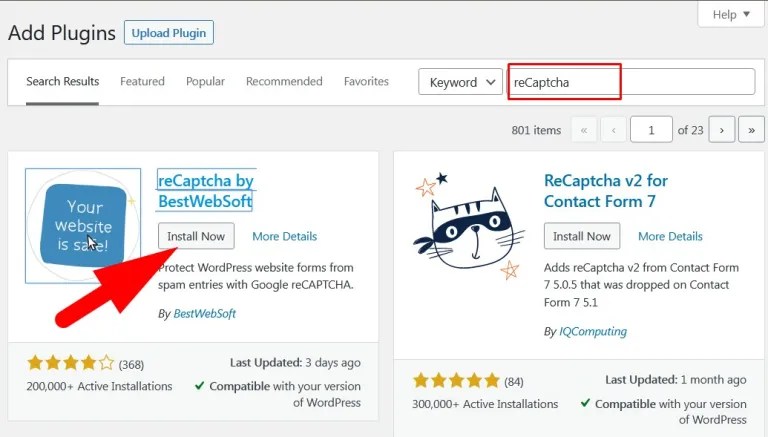
Install reCAPTCHA
5. After installing successfully. Activate the Plugin.
6. You will be directed to Installed Plugins page. Go to Settings of reCAPTCHA.
7. Now, on the reCaptcha Settings page, enter the credentials as directed.

reCaptcha Settings
8. reCaptcha Version: select the version of reCaptcha. (It is recommended to choose Version2)
9. Site Key: Enter the Site Key which you have copied.
10. Secret Key: Enter the secret key which you have copied.
11. Enable reCaptcha for: In this section, select the forms for which you want to enable reCaptcha.
12. reCaptcha Domain: Select the domain from the drop down, i.e, google.com.
13. Theme: Select the theme from the drop down.

Select Domain & Theme
14. Hide reCaptcha for: If you’ve multiple users of your WordPress account then you can hide the Captcha from the user.
15. Allow List Notification: Message that user will see.
16. Advanced Protection: Mark the box.
17. Disabled Submit Button: Check the box to disable submit button till successful attempt.

Complete & Save settings
Click over Save Changes.
Now, you can verify from WordPress login page.