Did you know that 50% of e-mail owners use a professional email signature?
Isn’t it heartbreaking that we aren’t taking advantage of this amazing feature to raise our personal and professional standards?
Okay, are you a little confused? How is this possible? Please allow me to clarify.
A signature should be unique, just as everyone’s name is different. In this digital age, you communicate via email and ensure that your communications are of the highest quality.
You may not have known, but Gmail Signature is a valuable and sometimes overlooked marketing tool.
Email signatures in your emails inform recipients about you and your firm, which has had a long-term impact on them.
Here are the ingredients for creating a professional email signature in your Gmail:
- Full Name
- Designation
- Company’s Name
- Contact details
- Company’s logo (small size works best)
- Social networking handlers
- Company’s website
1. How to Create Email Signature in Gmail
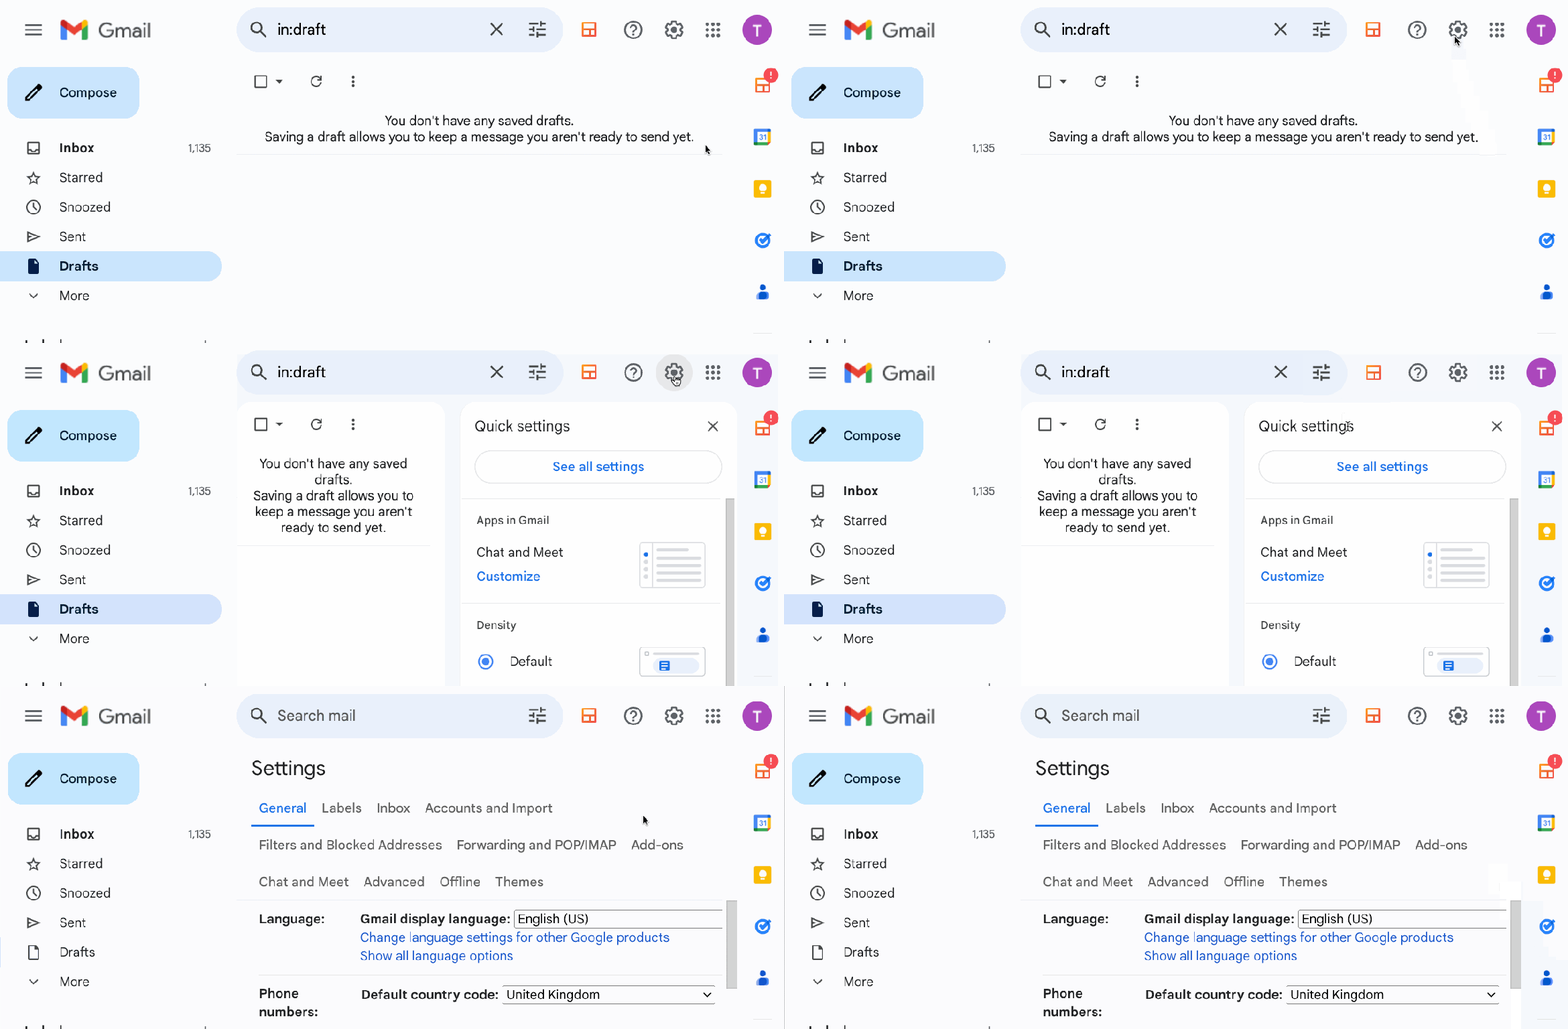
To add your Gmail signature, navigate to the settings by clicking the gear symbol in the upper right corner of Gmail and selecting See all settings.

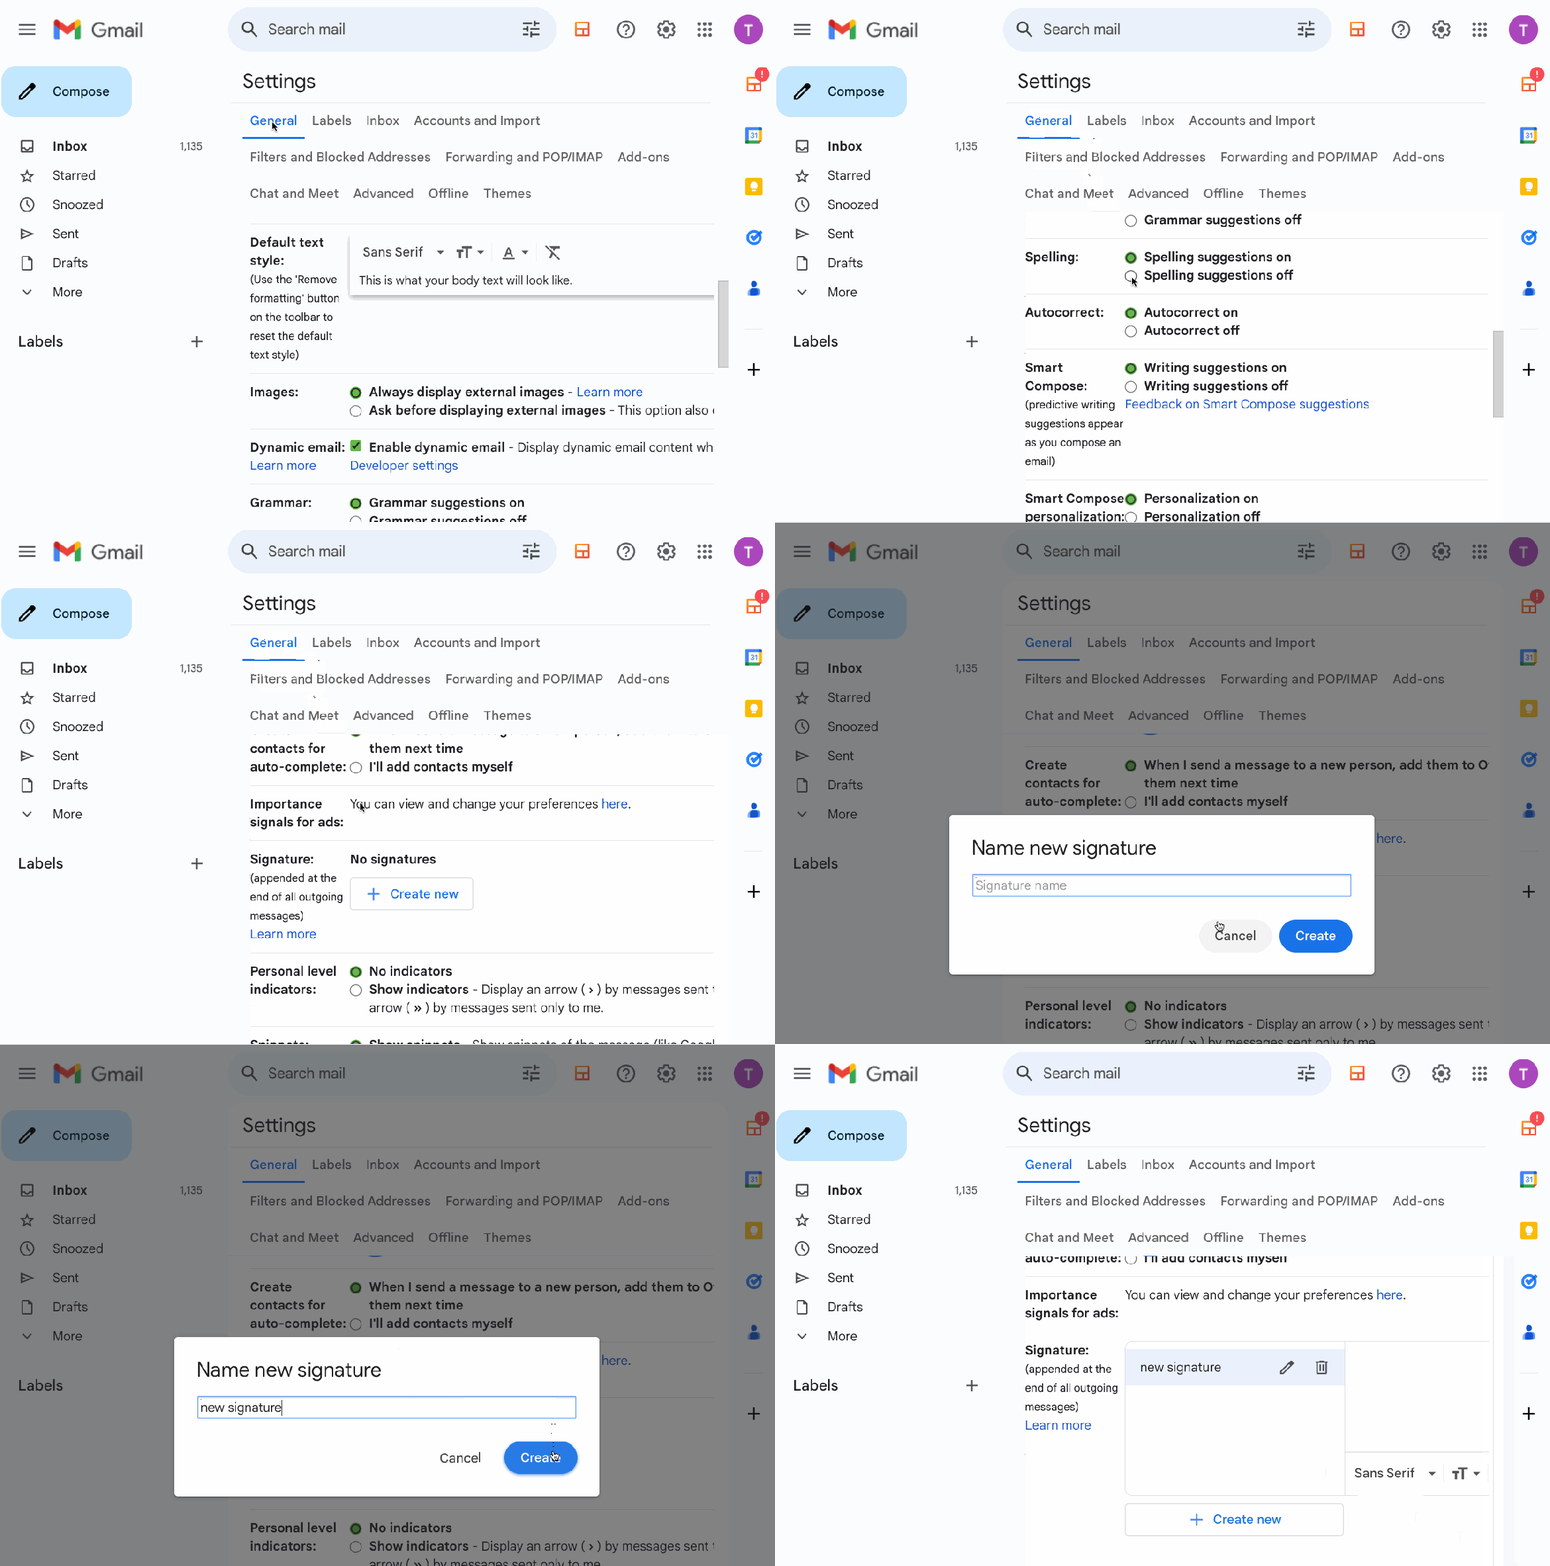
2. Create a new Gmail signature
Scroll down to the Signature area in Gmail Settings, located under the General tab.
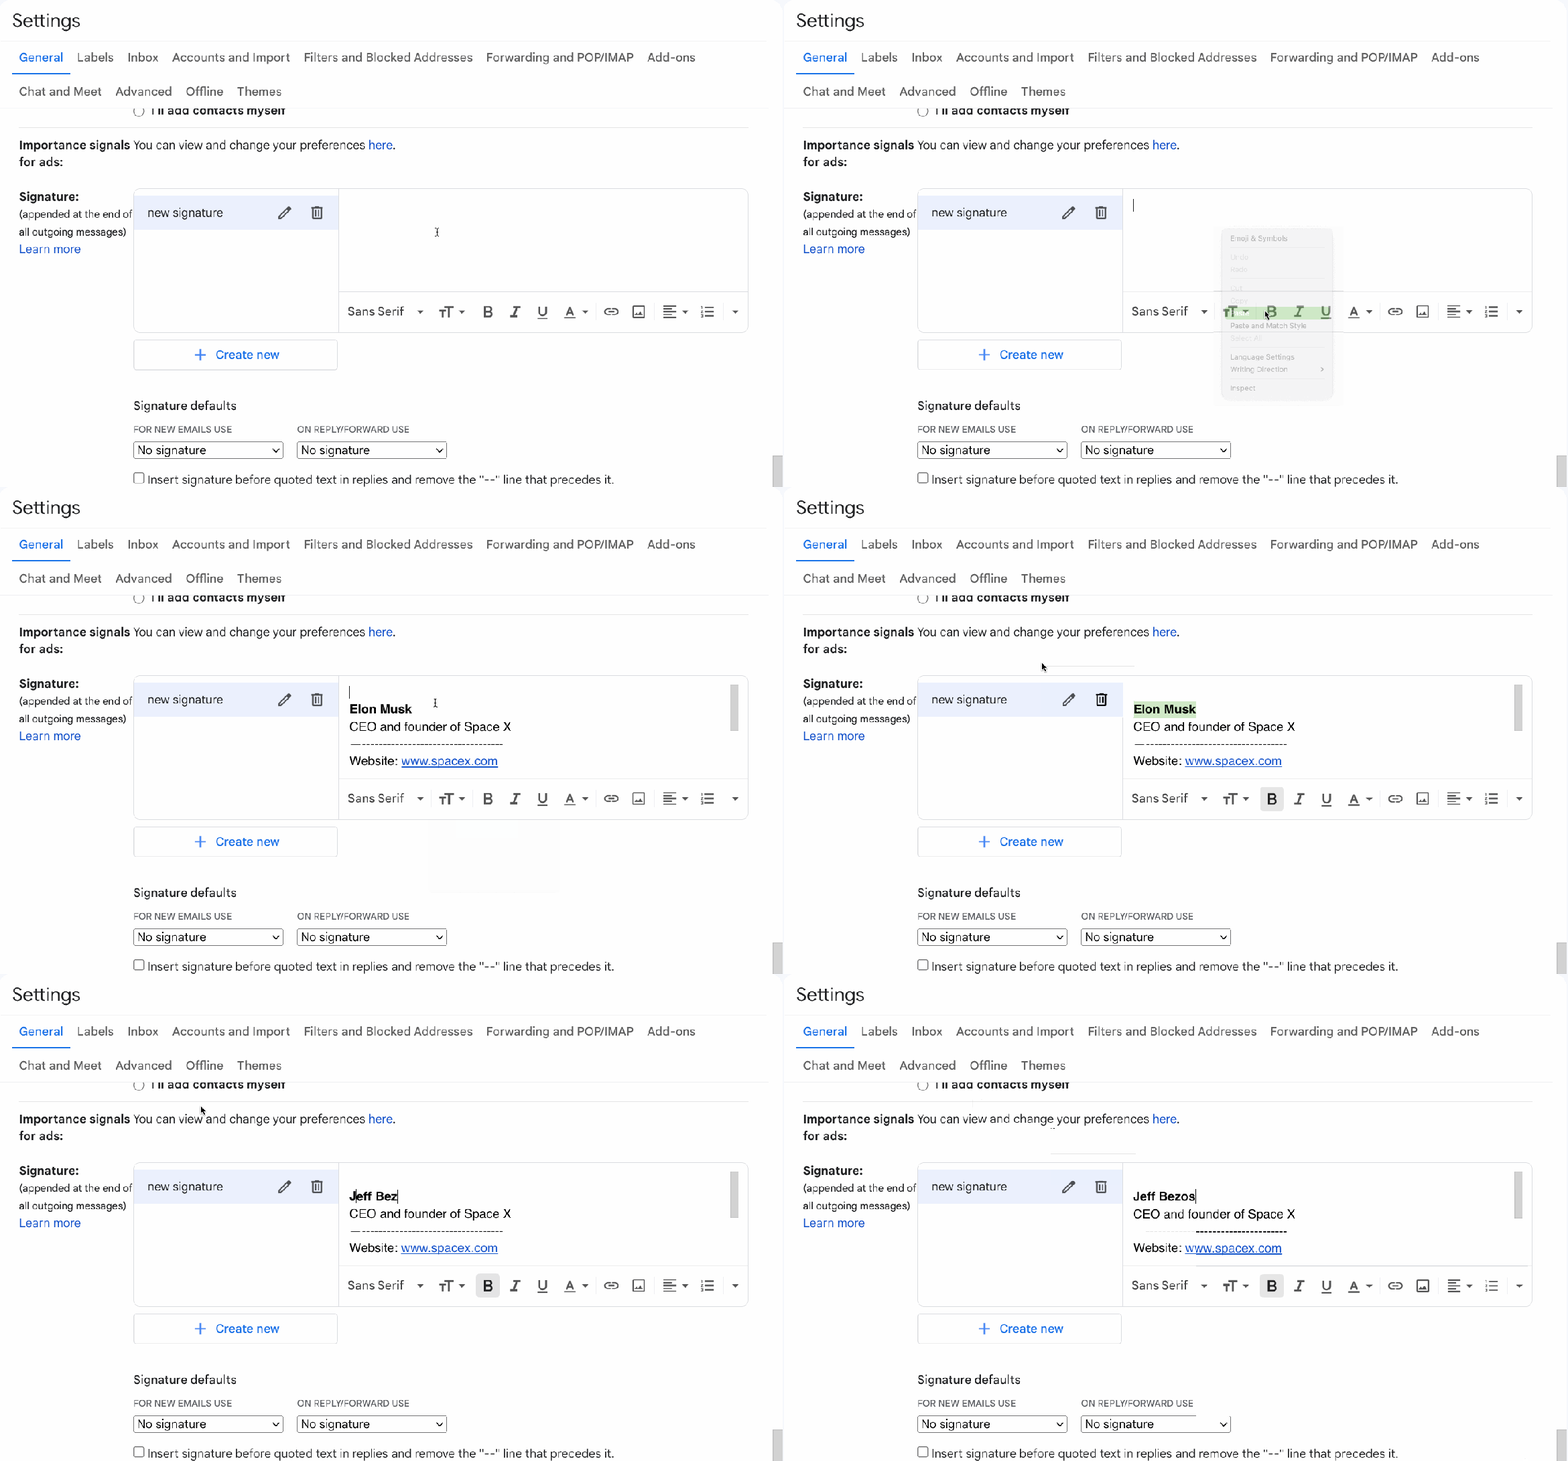
From this point, select Create a new signature > Name it > Additionally, you will be able to create a Gmail signature using the Gmail Signature Editor.

3. Add your Gmail signature contact details
To make a basic Gmail Signature, enter your name, role, phone number, and email address.
You can begin with this simple copy-and-paste Gmail signature template:
Elon Musk
CEO and founder of Space X
Website: www.spacex.com
Tel: 12345-000-000
1 Rocket Road, Hawthorne, CA 90250

4. Edit and add links to your email signature
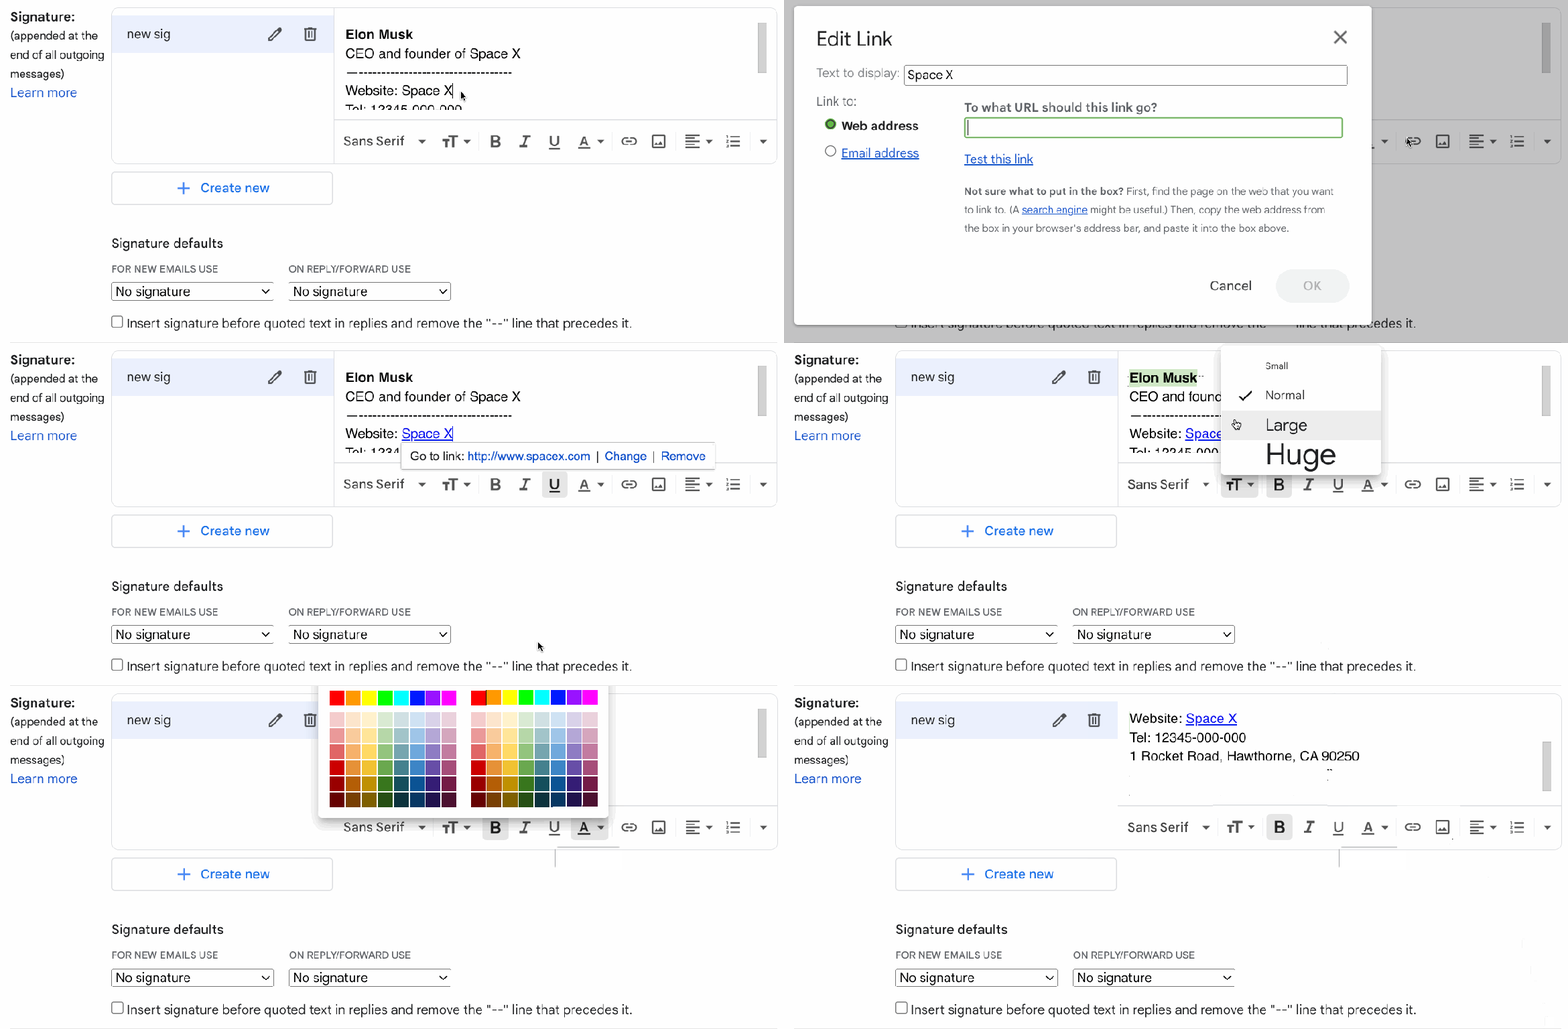
You can modify your email signature with links, brand colors, and fonts directly from the Gmail signature editor.
Add links to your email signature. Select the next link you wish to hyperlink and click the chain link button.
Customize the text: Choose a custom color for the text. Bold, italicize, and underline text. Add your brand’s colors.

5. Add images and logos to your Gmail email signature
If you wish to include a picture in your email signature, keep in mind that photos can increase the size of your email, which can reduce deliverability.
To include an image in your email signature, select the image icon from the editor here:

However, make sure your image is optimized for your email signature and build a great layout.
6. Setup automatic Gmail signature
Once you’ve created a Gmail email signature, you can specify when it shows at the bottom of emails.
You can set your signature to:
- Appear at the bottom of all new emails sent.
- Regarding answers and forwarded emails.
To keep conversations from becoming bloated, I prefer to use my primary email signature for new emails and a minimalist email signature for answers and forwarded emails.
7. Save changes
Now that you’ve created your Gmail email signatures, save your changes so that your signature will work with your next email.
Scroll to the bottom of the Gmail settings and select Save Changes.
You May Also Like
How to add a signature to Gmail on Android:
- On your device navigate to the Gmail app.
- At the top left, tap Menu.
- Find and tap Settings.
- Choose the Gmail account you want to add your signature.
- Select Mobile Signatures.
- Create your Gmail Signature.
How to add a signature to Gmail on iPhone:
- On your device navigate to the Gmail app.
- At the top left, tap Menu.
- Find and tap Settings.
- Toggle ‘Mobile signature’
- Add or edit your mobile signature.
- Click Back to save.
Concluding
All I want to say is that developing a professional email signature is not rocket science. You don’t need to be an artist. All you need is a correct process of thinking, and be straightforward about the concept that you want to express in your signature.
Let me know how you’ve made your own. Fancy or easy, huh? Casual or competent, huh? Please share your views in the comments box below.


