What Exactly Are Nameservers?
Nameservers are components of the domain name system’s global database. Their role is to direct other computers to the location of a domain name.
- What Exactly Are Nameservers?
- Changing Nameservers in Hostinger
- Changing Nameservers in GoDaddy
- Changing Nameservers in Domain.com
- Changing Nameservers in Namecheap
- Changing Nameservers in Google Domains
- Changing Nameservers in SiteGround
- Changing Nameservers in Bluehost
- Steps to Follow After Changing Nameservers
- Conclusion
If your web hosting account is the house in which your website files reside, the domain name is the street address of that property.
Nameservers direct the internet to the website address associated with a domain name.
To change domain nameservers, take the following two steps:
- Get the new nameserver values.
- Use the new nameserver values.
Changing Nameservers in Hostinger
The DNS Zone Editor at Hostinger allows you to simply edit the NS records.
- Select your domain in the Domains section.

2. Then, by clicking the Change button, go to the nameservers management page.
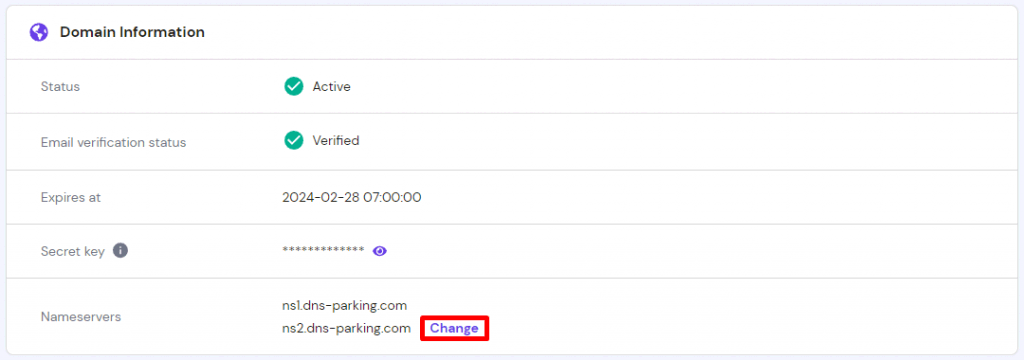
3. Finally, select Change nameservers, enter new nameservers, and click Save.
Changing Nameservers in GoDaddy
To change the nameservers at GoDaddy, follow these steps:
- Select the Domains link by clicking the My Account icon.

2. On the My Domains page, click the Manage DNS option.

3. Scroll down to the middle of the page after selecting the domain you want to control. Click Change next to the Nameservers section.
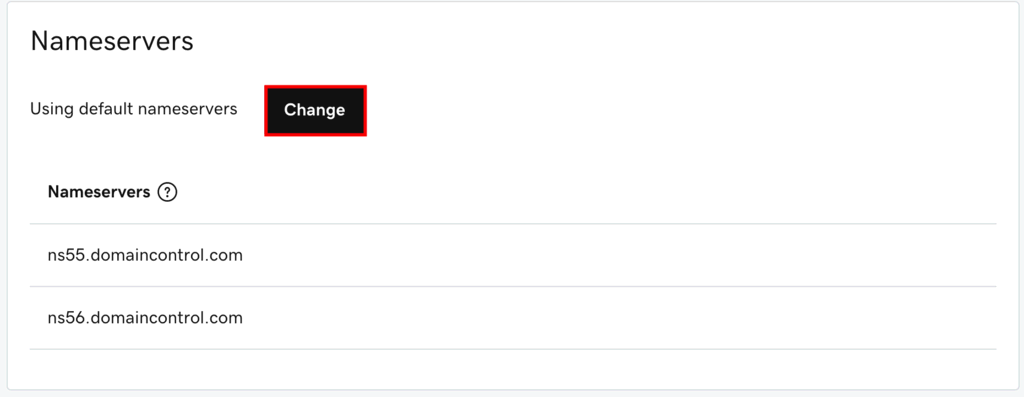
4. Finally, select the advanced option, type in new nameservers, and click Save.

Changing Nameservers in Domain.com
To update your nameservers, you must first log in to your Domain.com account. Then, under the left sidebar, click the ‘DNS & Nameservers’ link.

You will be directed to a page where you may view your DNS records. Simply scroll down to find the NS records. These should be ns1.domain.com and ns2.domain.com.
To begin, click the three vertical dots next to ns1.domain.com, then select Edit.

Simply enter the new nameserver into the ‘Content’ box and press the ‘Update DNS’ button.
Changing Nameservers in Namecheap
Open the Domain List area on Namecheap if you are using it.
1. Next to your domain, click Manage.

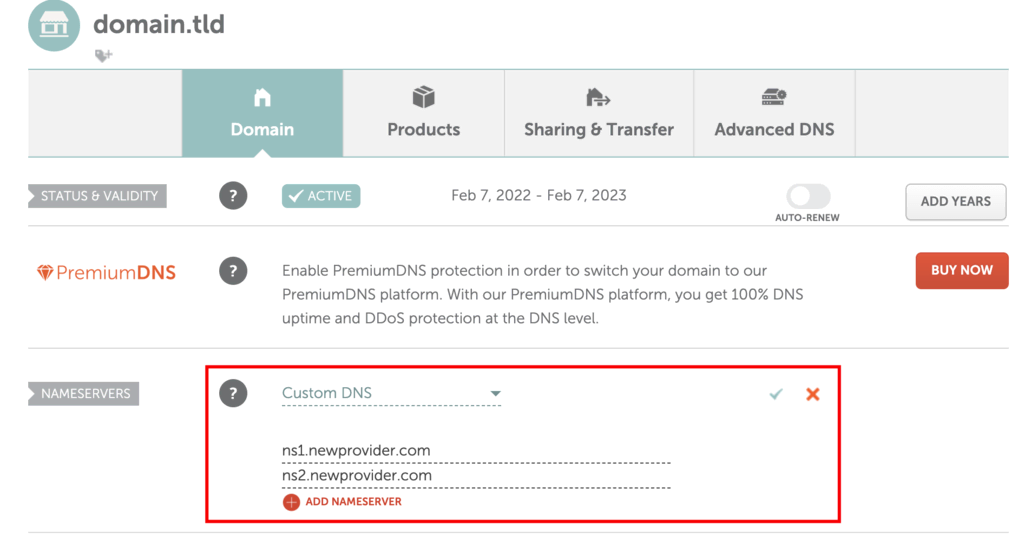
2. Locate the Nameservers section, choose Custom DNS, and then type in the new nameservers. Then, save the modifications.
Changing Nameservers in Google Domains
Open the main dashboard in Google Domains, then click the My domains section:
- To manage your domain, click the Manage option.

2. Navigate to the DNS page next.
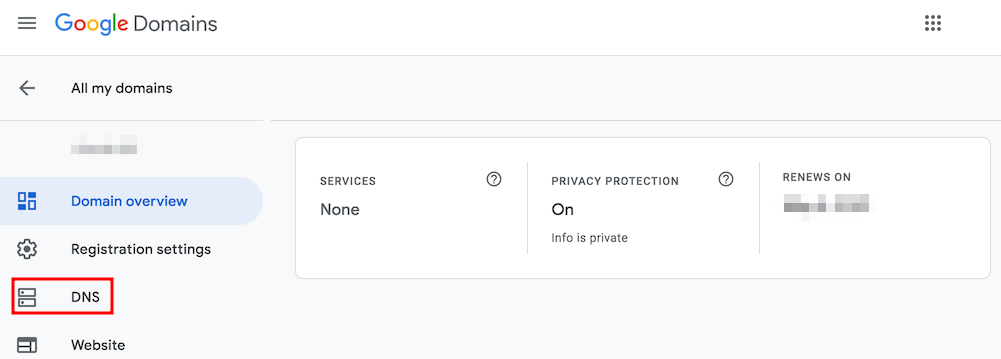
Click the Disable DNSSEC button on the DNS page. To correctly switch nameservers, this step is required.
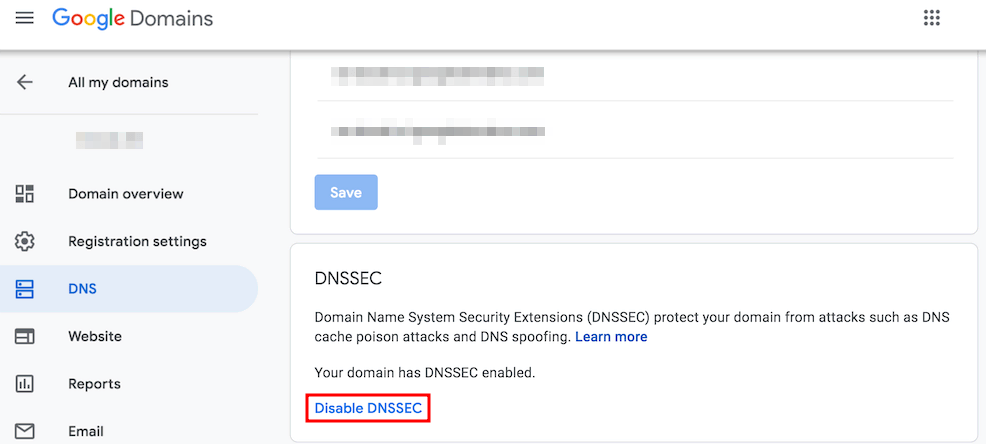
Locate the Name servers section with DNSSEC deactivated, then add the new nameservers. Click Save when finished.

Changing Nameservers in SiteGround
In the Services Domains area of SiteGround, choose your domain and click the Manage option.
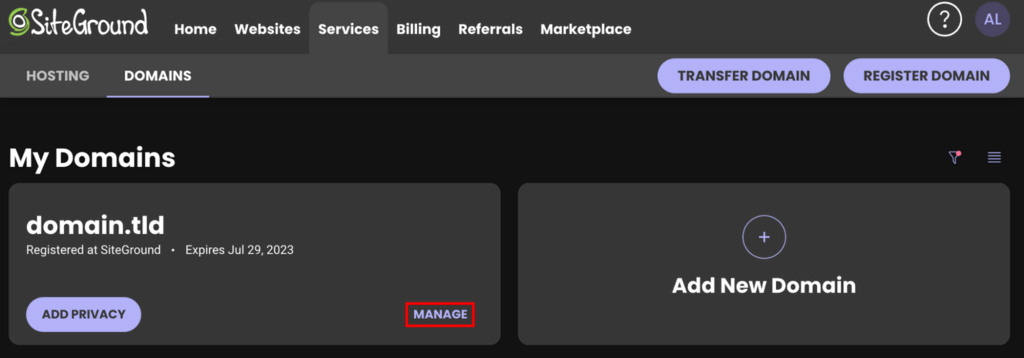
On the right side of the screen, look for the Manage nameservers button.

On the new screen, enter the new nameservers and press Confirm to save the adjustments.

Changing Nameservers in Bluehost
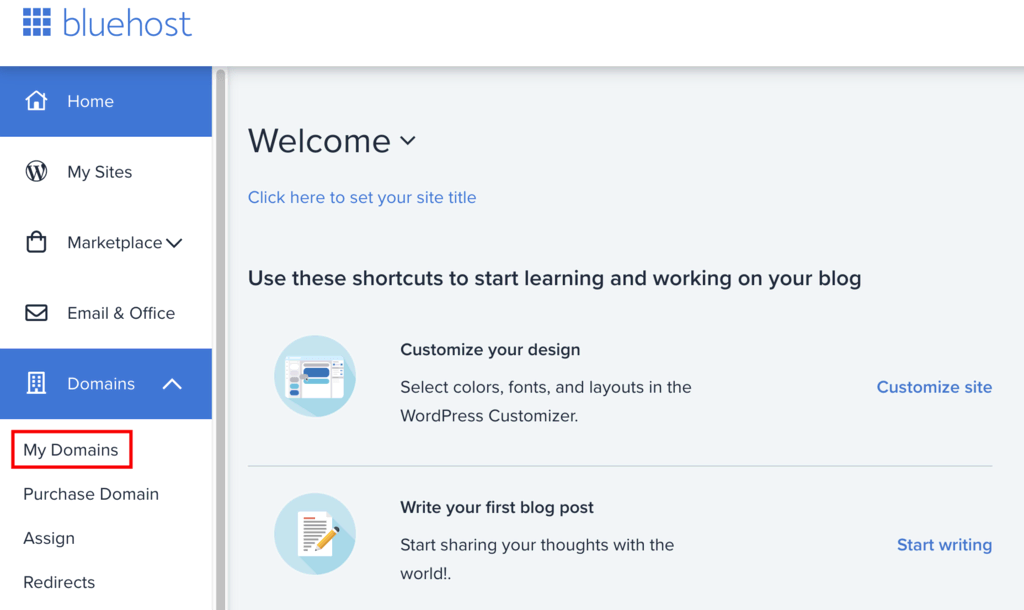
Select the My Domains option on Bluehost to switch nameservers.
Click Manage after selecting your preferred domain.
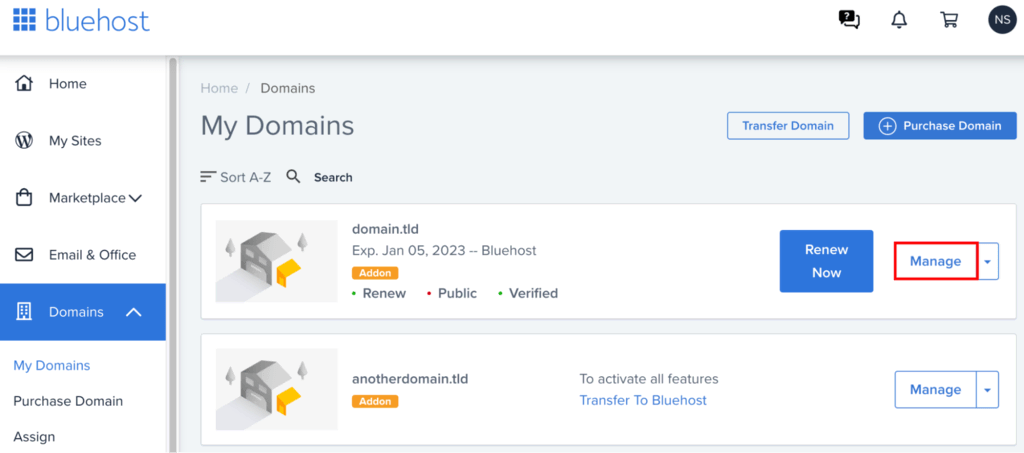
Go to the DNS section and select Edit.
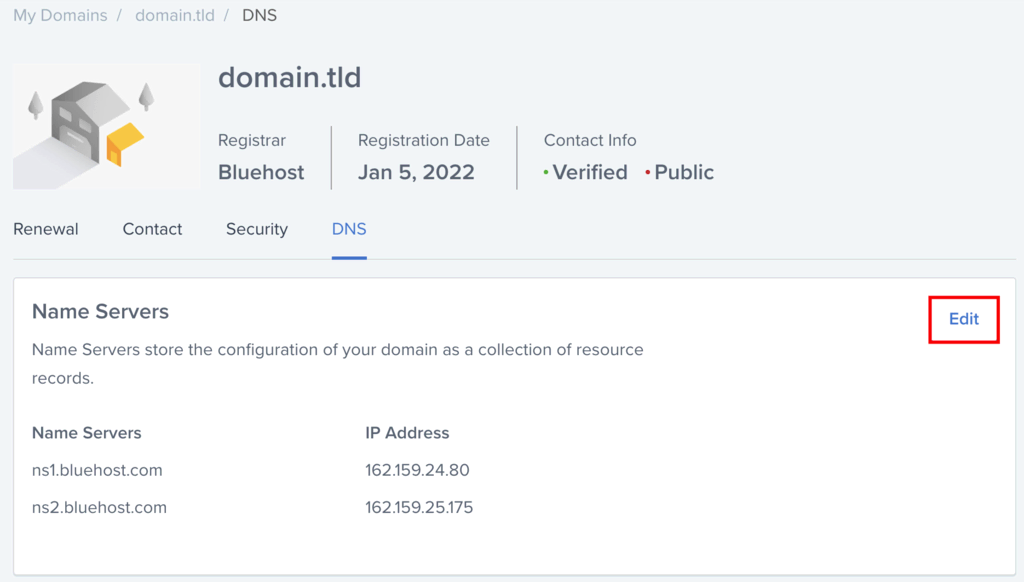
Finally, add new custom nameservers and save your changes.
Steps to Follow After Changing Nameservers
Wait for the modifications to take effect after you’ve configured the nameservers. This is known as global DNS propagation, and it can take up to 24 hours.
While propagation is automated, users can simply monitor its progress using programs like DNS Checker. Simply enter the domain, select NS as the DNS record type, and click Search.
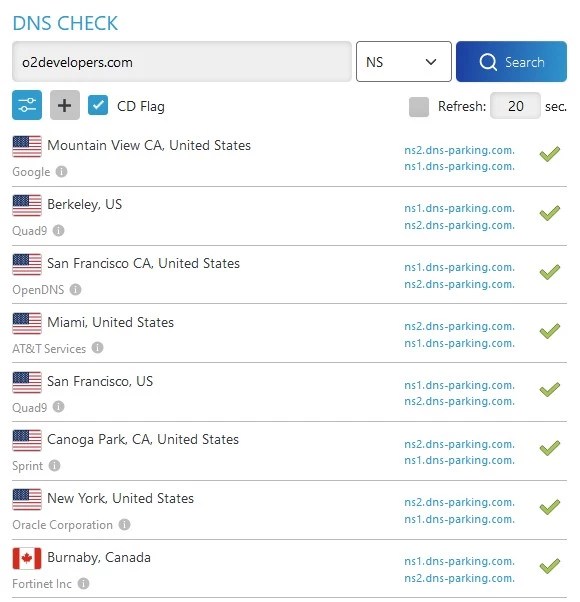
The new nameservers should be visible at the majority of places. If some locations do not display fresh nameserver values after 24 hours.
Conclusion
Changing your nameservers is one of the most crucial tasks to take when transferring hosting providers and redirecting your domain.
In this guide, we’ve covered the many processes required to change nameservers for the most popular hosting providers. Let’s go over everything again:
- Obtain the updated nameserver values.
- Use the new nameservers at the current registrar.
- Wait for the propagation process to complete so that the website can be accessed again.
We hope you found this tutorial useful. If you have any queries, please leave them in the comments area below.
You may also like our most popular WordPress Tips n Tricks.


