You may want to prevent an application from accessing the Internet at times. This tutorial will show you how to use the Windows firewall to block a program in Windows 11.
Normally, you would want your applications to have unrestricted network access. However, if you want to prevent a program from accessing the Internet for whatever reason, you can follow the step-by-step guide below to block a program with Windows firewall in Windows 11.
How to Block a Program in Windows 11 Using the Windows Firewall
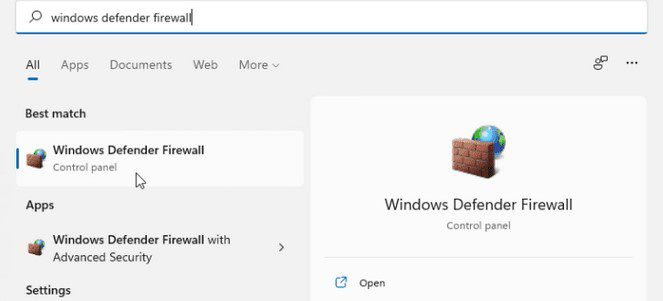
Step 1: Launch the Windows Firewall application.
You can also type Windows Defender Firewall into the Start menu. Open Windows Defender Firewall by selecting the top result.
To open Windows Control Panel, click Start, type control panel, and select the top result. Then, to open Windows Defender Firewall, go to System & Security -> Windows Defender Firewall.
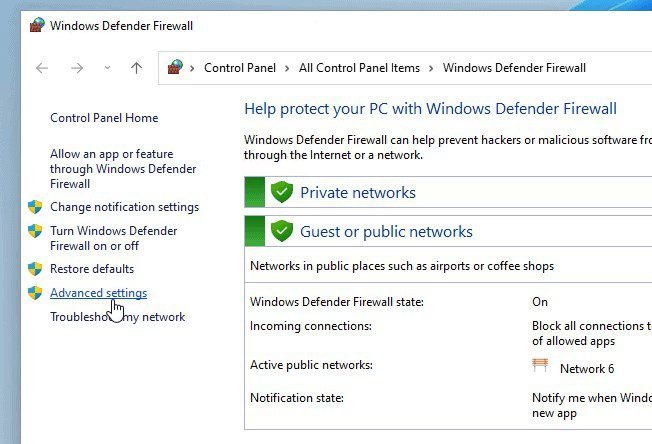
Step 2: Select Advanced Options.
You can enter the Windows Defender Firewall with Advanced Security app by clicking Advanced settings in the Windows Defender Firewall.
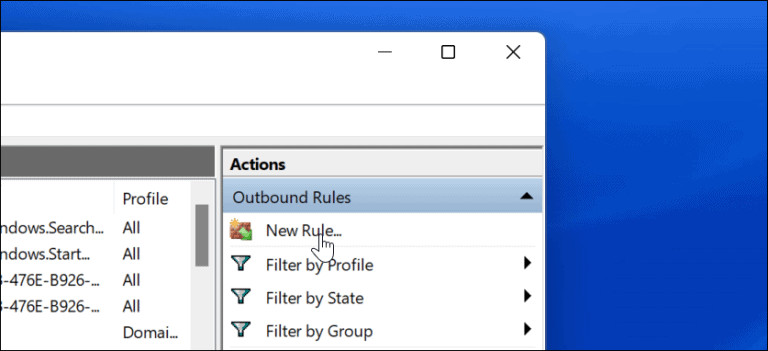
Step 3: Navigate to the Firewall rule creation window.
Then, in the left column, click Outbound Rules, which will display all existing outbound Windows firewall rules in the middle window.
In the right Outbound Rules Actions column, click New Rule to open a new window where you can create your own Firewall rule.
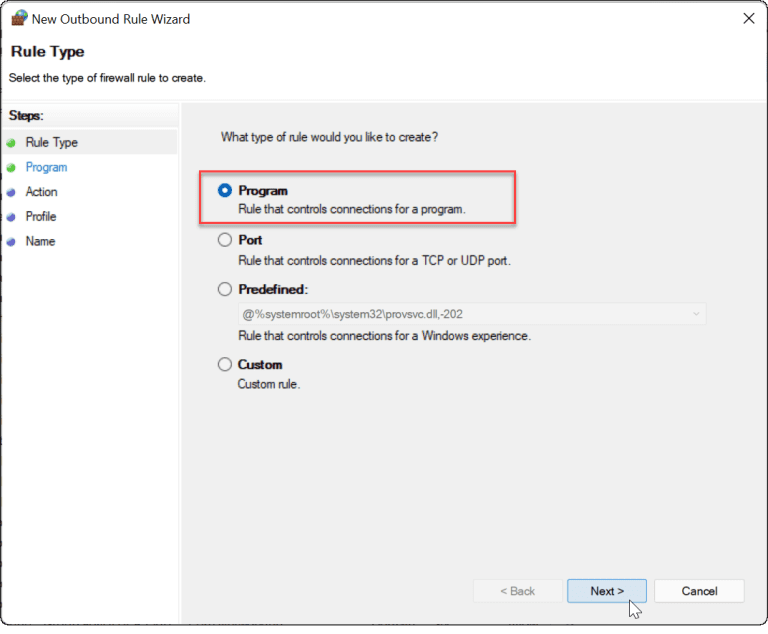
Step 4: Add a new Firewall rule.
You can select “What type of rule would you like to create?” in the new window.
To get ready to rule controls connections for a program, click Program and then Next.
Step 5: Select the desired program.
To find the path of the target program you want to block, select This program path and click Browse.
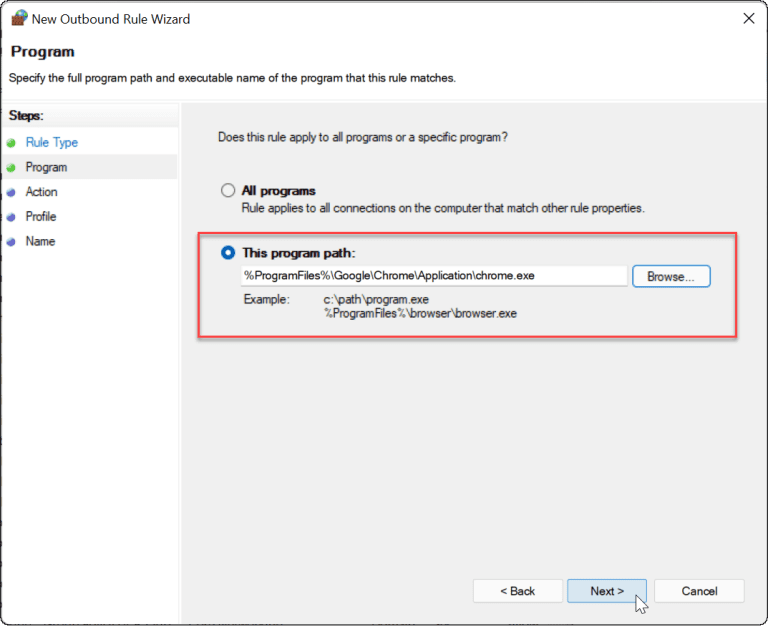
You can open the program’s folder and select the target program by clicking This PC in the left column.
When you open the program in Firewall, Windows will restructure the file path. You can get around this by manually copying and pasting the file path into the box.
Copy the program’s path from the address bar and paste it into the box. At the end of the path, please include the app’s name and extension.
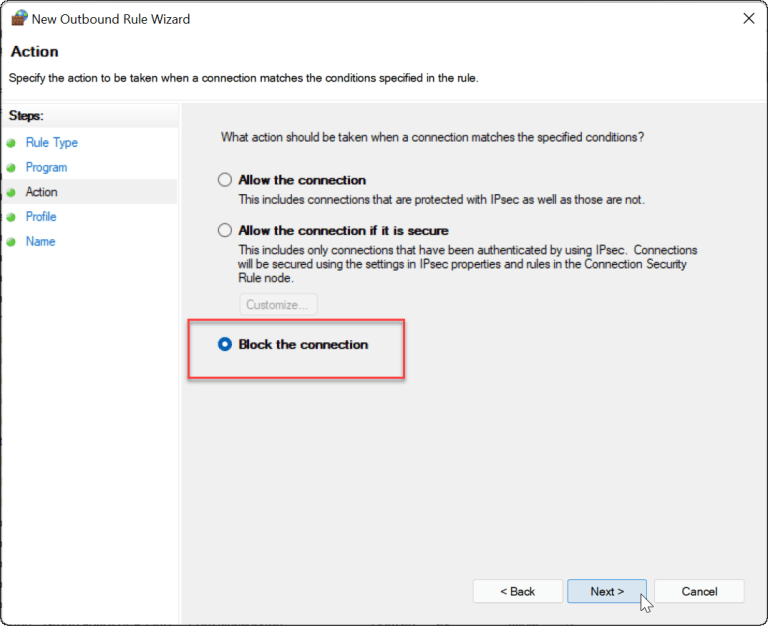
Step 6: Give the firewall rule a name.
You can name the new Firewall rule by clicking the Next button three times. Then click the Finish button to create a new Firewall rule that will block the program from accessing the Internet with Windows Firewall in Windows 11.
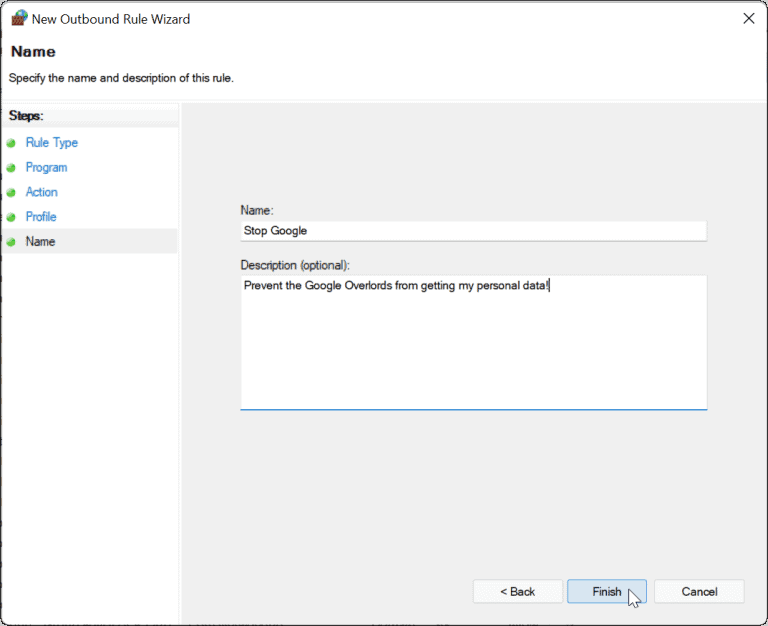
How to Disable an App Internet Blocking Rule on Windows 11
If you blocked an app’s access to the internet but you want to give access back, you can. You’ll need to disable the Outbound Rule in the Windows Defender Firewall menu that you created previously.
To do that, use the following steps:
- Open the Start menu, type Windows Defender Firewall, then click the best match result.

2. In Windows Defender Firewall, click Advanced settings on the left.

- In the next menu, press Outbound Rules from the left-hand panel.
- Find the name of the rule you created previously (you can sort by name), then right-click it and select Disable Rule.
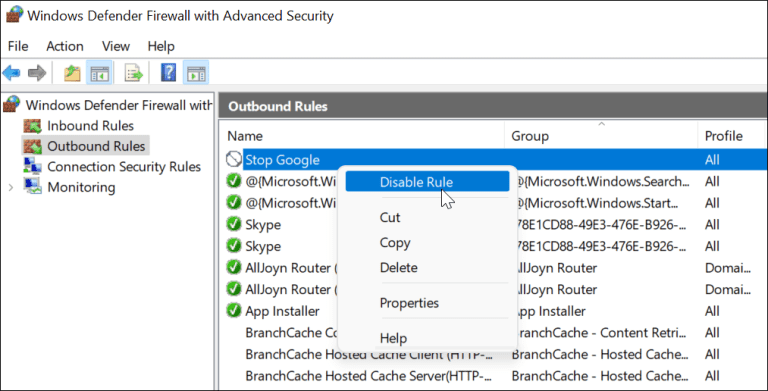
5. You can also select the outbound rule you created and disable or delete it from the Actions pane on the right.
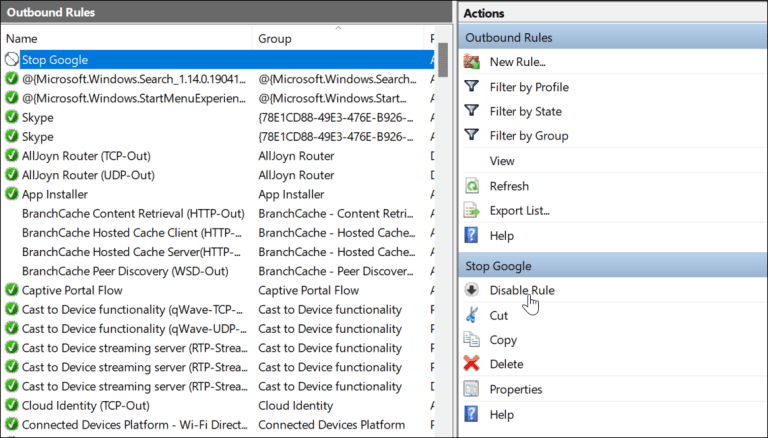
After disabling or deleting the outbound rule, the app you created it for will now connect to the internet.
Protecting Your Internet Connection Using Windows Firewall
You can prevent programs on a Windows 11 PC from accessing the internet by following the instructions above. Disabling the rule will enable internet connectivity once again if you choose to regain access. You must follow the following instructions again to create a rule once it has been deleted.
The Windows Defender Firewall is an essential aspect of Windows Security, a program created to keep a Windows computer safe from malware. Windows Security provides broader security. You can also block a website on Android to help secure that device if you use that operating system instead of Windows, which is the only place where you can do so.


